Problems & Solutions for Building Constructions
Every surface will have its share of problems over time such as patchiness, efflorescence, peeling, hairline cracks, fungus, water leakage, corrosion or bubbling. As the total coating and construction solutions provider, Nippon Paint's comprehensive solutions address common construction pain points, ensuring a beautiful and high-quality finishing for your building.
Which area or type of surface is facing a problem?
Choose the problem area or material.
What type of problem are you facing?
Select the problem or signs of what is most similar to the issue.

Patchiness
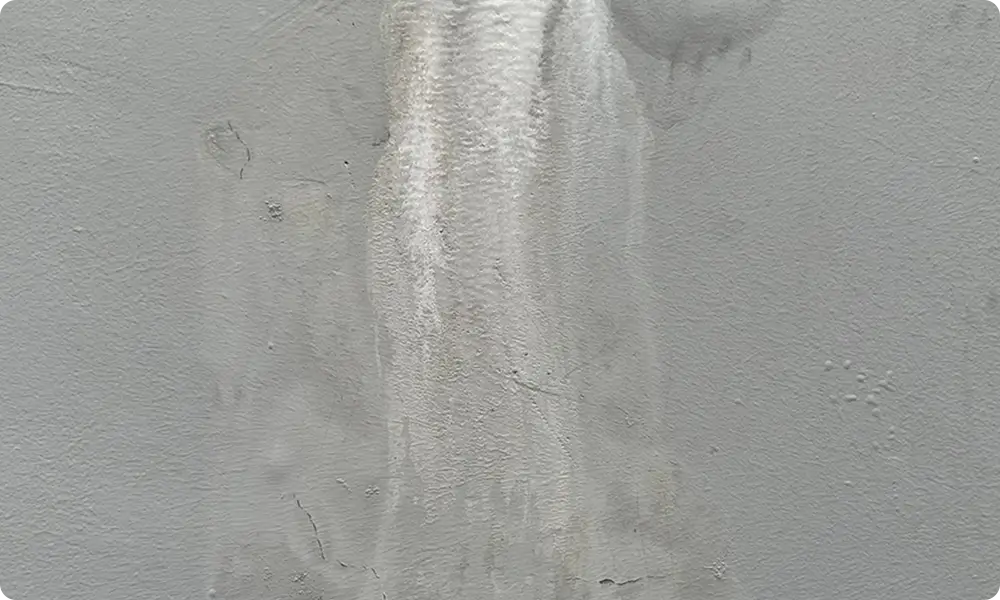
Efflorescence
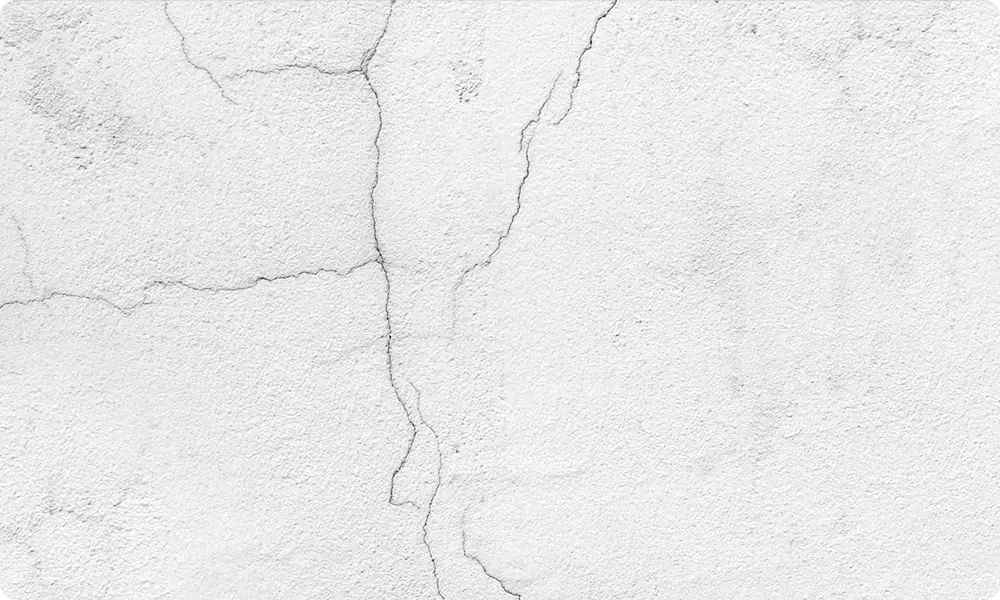
Wall Crack
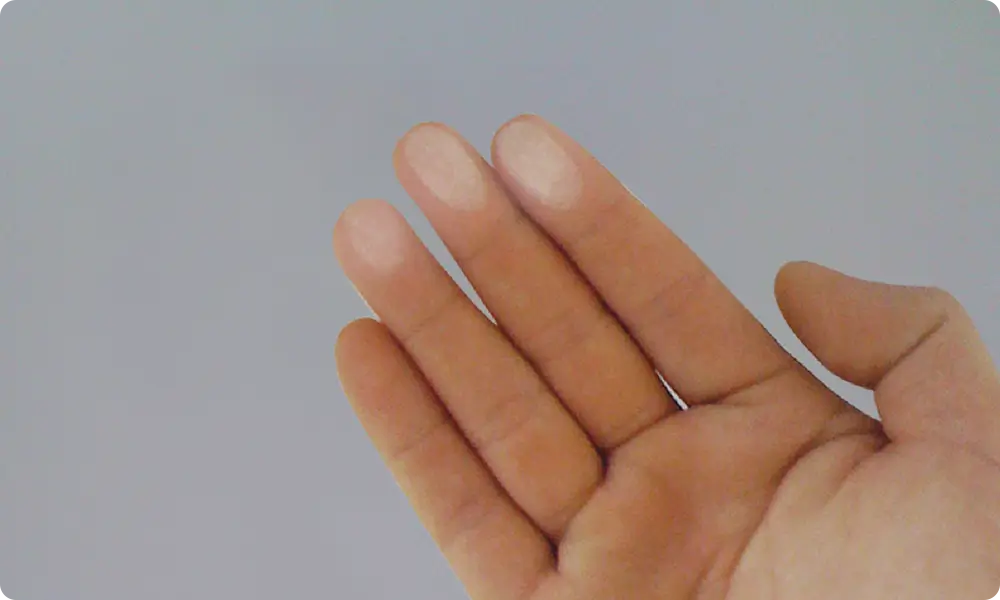
Powdery Surface
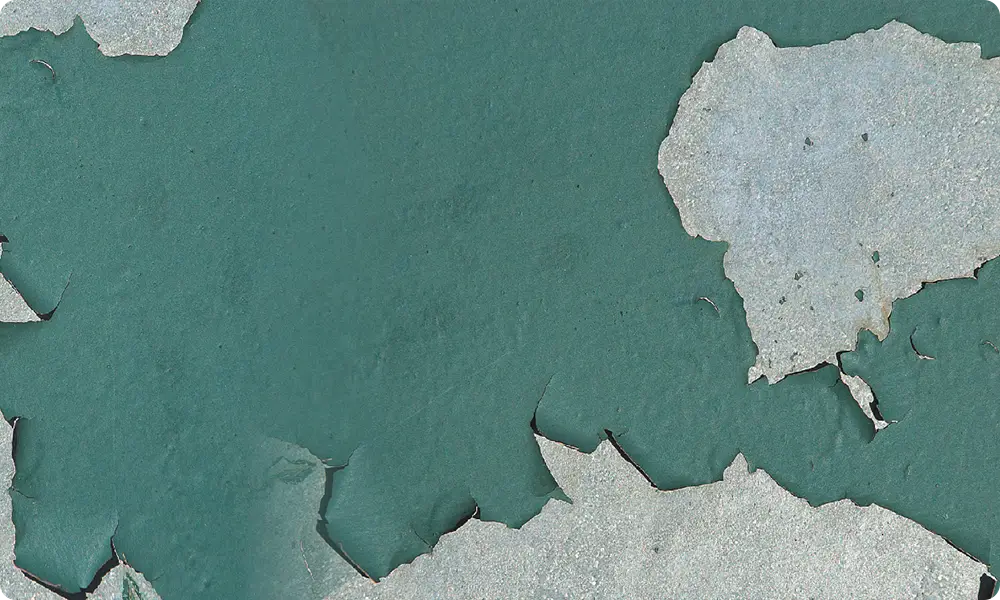
Paint Peeling
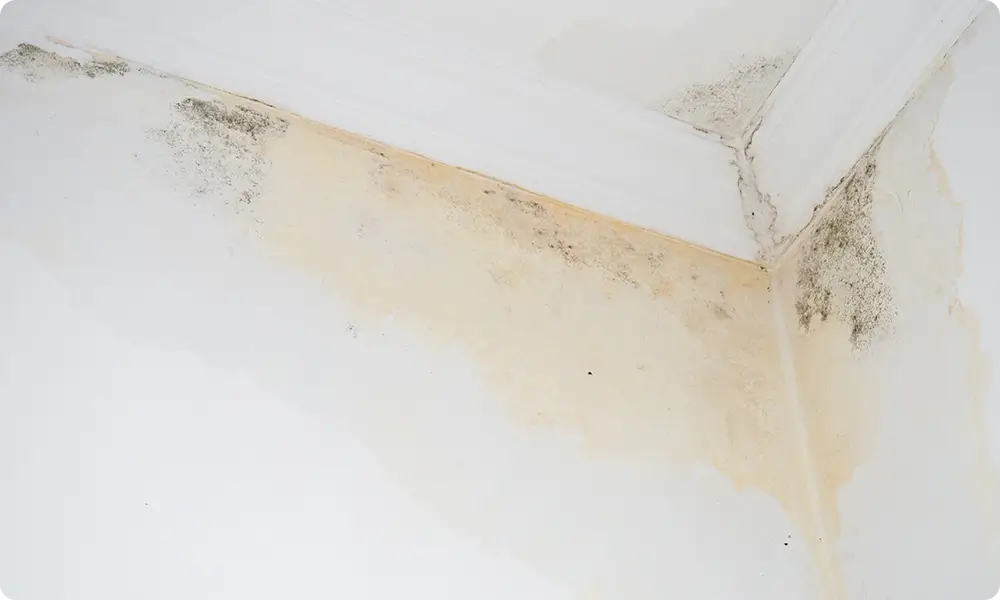
Watermark
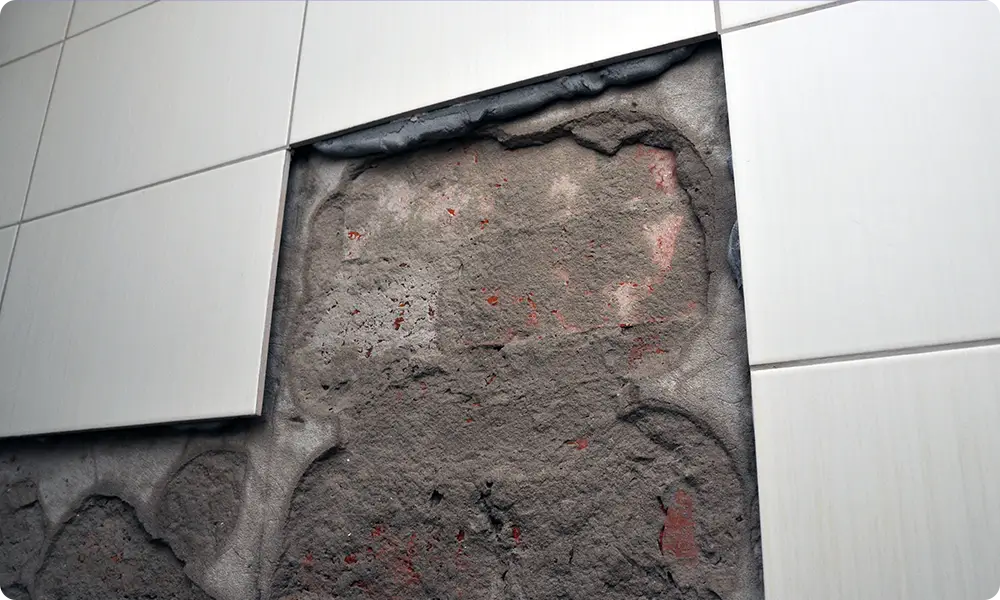
Tile Delamination
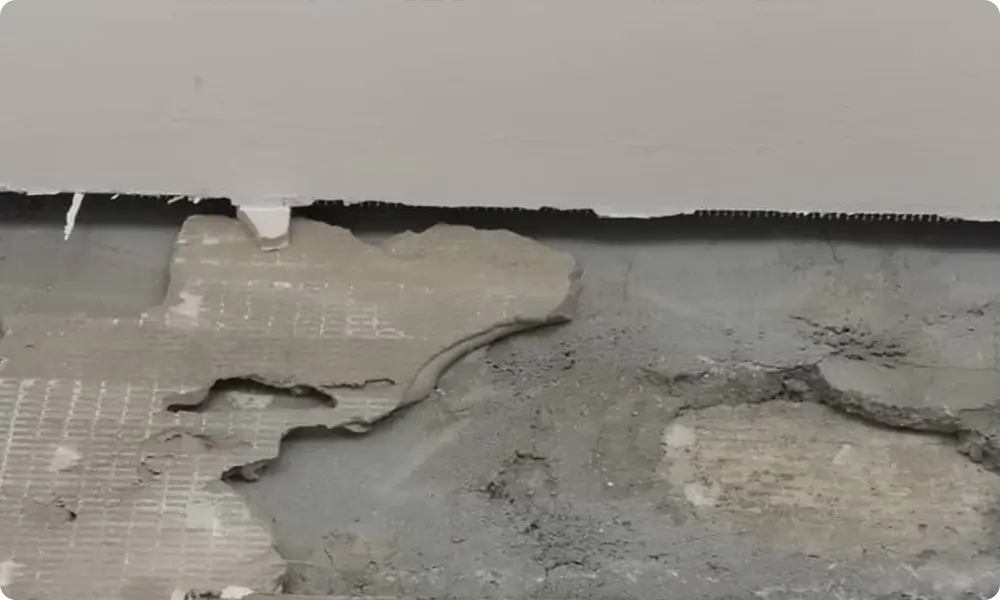
Hollowness
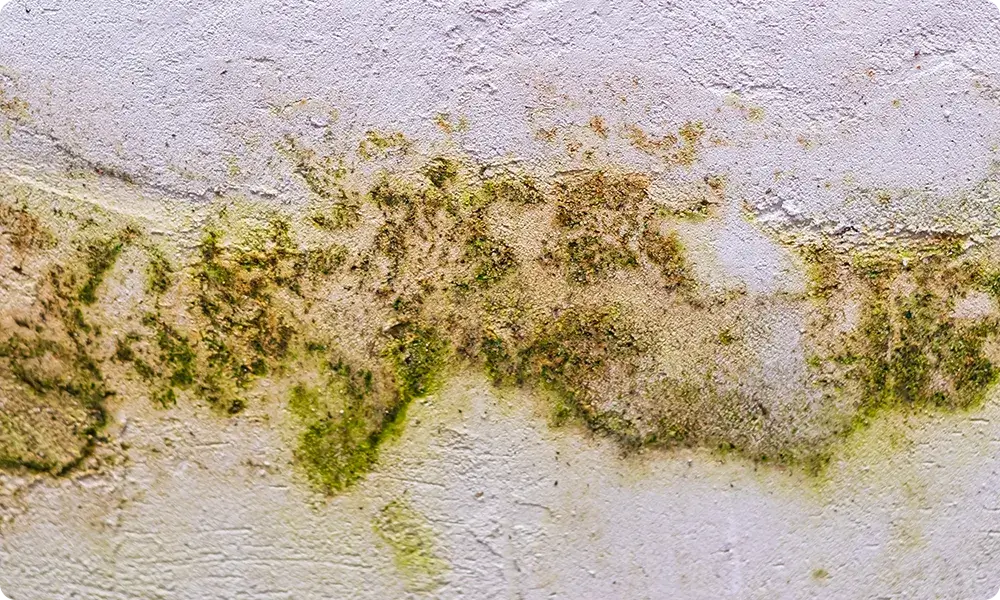
Fungus and Mould
Rising Damp Wall
Paint Peeling
Paint Bulging
Thermal Shock Cracking
Tiles Buckling
Water Leakage (Flat Roof)
Water Leakage (Obstacle Roof)
Water Leakage (Bathroom)
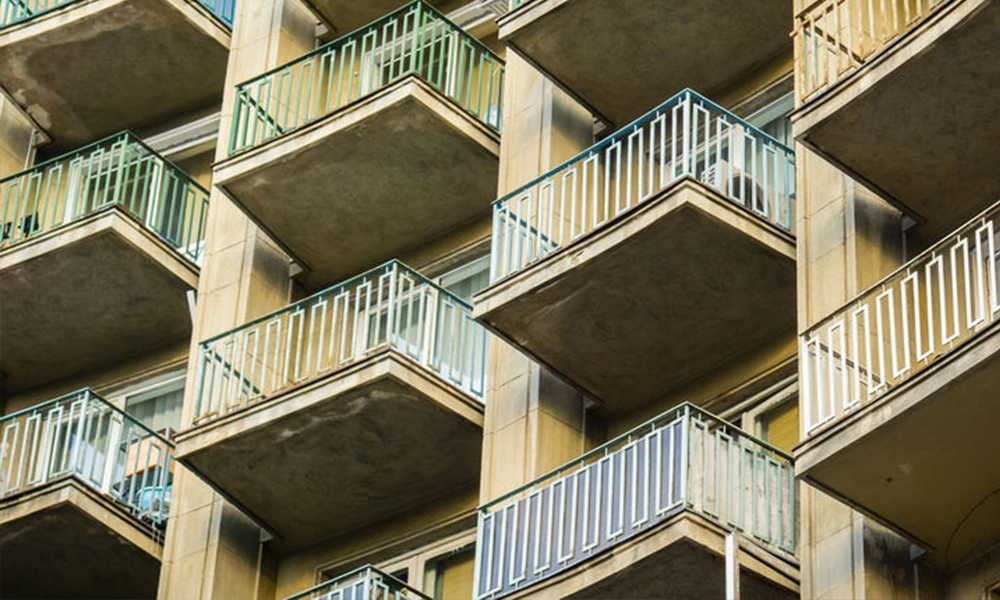
Water Leakage (Balcony)
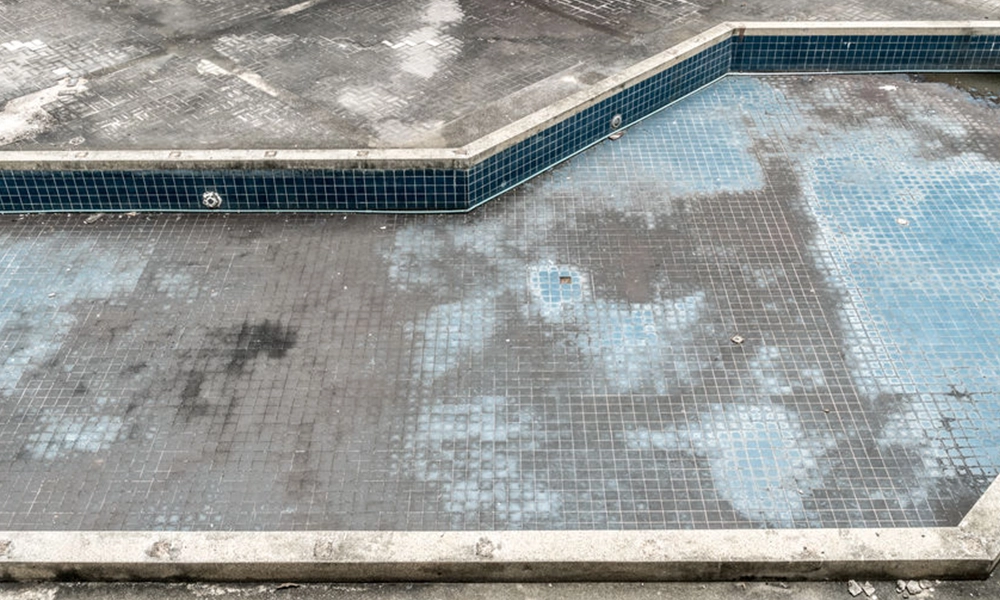
Water Leakage (Swimming Pool)
What is Patchiness?
Patchiness is a common issue in many buildings, often appearing as uneven, bumpy areas or cracks on interior walls. These imperfections can ruin the smoothness and overall appearance of your surfaces. Nippon Paint’s innovative anti-patchiness solutions are specifically designed to tackle this problem, delivering a smooth, flawless finish that elevates the look of your walls.

How to Solve Patchiness Problem on Walls
Step 1. Surface Preparation
Sand off the paint until the surface is smooth. You can sand down to the skim coat layer. Use sandpaper with a grit of 150 to 200.
Step 2. Joint Compound
Apply a thin layer of joint compound to the sanded surface and allow it to dry thoroughly.
Recommended products
EasySKIM 5000 All Purpose Joint Compound
Step 3. Sanding
Lightly sand any unevenness using 180 or 200 grit sandpaper.
Step 4. Sealer / Primer
Apply a coat of sealer to protect your walls from moisture and surface imperfections.
Recommended products
Sealer / Primer:
Acrylic 5170 Wall Sealer or
Hi-bond Wall Sealer
Step 5. Finish
Finish it off with a topcoat specially formulated for protecting interior walls.
Recommended products
Topcoat:
Super ECO 5000
What is Efflorescence?
Efflorescence appears as a whitish or greyish deposit on the surface of porous materials, caused by the migration of water-soluble salts to the surface when exposed to moisture through cracks in the wall. It is a problem commonly observed on concrete, brick, or masonry surfaces.

How to Solve Efflorescence Problem on Walls
Step 1. Surface Preparation
Remove all efflorescence salt deposits, dirt and other foreign matters using a high pressure water-jet (min. 1500 psi).
Step 2. Crack Reparation
Allow all the rectified areas to dry thoroughly with a moisture level below 16%.
Recommended products
Hairline Crack Reparation:
EasySKIM PLUS 2000 or
NippoSEAL Flex 200 Fibre Pro
Normal Cracks Reparation:
CrackREPAIR 1000
Step 3. Sealer / Primer
Apply a coat of sealer to protect your walls from moisture and surface imperfections.
Recommended products
Sealer / Primer:
5100 Wall Sealer
Step 4. Finish
Finish it off with a topcoat specially formulated for protecting exterior walls.
Recommended products
Topcoat:
Weatherbond®
Weatherbond® Hi-Gloss
Weatherbond® Solareflect Extreme
Weatherbond® Ultimate
What is Wall Crack?
Cracks on interior and exterior walls are caused by the expansion and contraction of wall surfaces. Wall cracks are aesthetic problems but may also be a sign of structural issues. A professional should be contacted if your building has wide or long cracks, but generally, hairline cracks can be fixed with the right steps.

How to Solve Wall Crack Problems on Walls
Step 1. Surface Preparation
Thoroughly clean and dry the substrate free of dust, grease, and oil. Remove any contaminants and remaining loose paint film.
Step 2. Crack Reparation
Repair any cracks on the surface prior to paint application. Allow all rectified areas to dry thoroughly with a moisture level below 16%.
Recommended products
Hairline Crack Reparation:
EasySKIM PLUS 2000 or
NippoSEAL Flex 200 Fibre Pro
Normal Cracks Reparation:
CrackREPAIR 1000
Step 3. Sealer / Primer
Apply a coat of sealer to protect your walls from moisture and surface imperfections.
Recommended products
Sealer / Primer
5200 Interior Sealer
Step 4. Topcoat
Finish it off with a topcoat specially formulated for protecting interior walls.
Recommended products
Topcoat:
Super ECO 5000
Step 1. Surface Preparation
Make sure the surface is thoroughly dry and clean, free from dust, grease, oil, contaminants and any remaining loose paint film.
Step 2. Crack Reparation
Repair any cracks on the surface prior to paint application. Allow all rectified areas to dry thoroughly with a moisture level below 16%.
Recommended products
Hairline Crack Reparation:
EasySKIM PLUS 2000 or
NipponSEAL Flex 200 Fibre Pro
Normal Cracks Reparation:
CrackREPAIR 1000
Step 3. Sealer / Primer
Apply a coat of sealer to protect your walls from moisture and surface imperfections.
Recommended products
Sealer / Primer:
5100 Wall Sealer
Step 4. Topcoat
Finish it off with a topcoat specially formulated for protecting exterior walls.
Recommended products
Topcoat:
Weatherbond® Series (Quartz)
What is Powdery Surface?
Powdery and chalky residue on walls are caused by inadequate surface preparation, which leads to the migration of moisture from the surface that is not fully dried before painting. Aging and deterioration of the existing paint film can also be a factor for powdery wall surfaces. This problem can worsen if the wall is exposed to rain and sun.

How to Solve Powdery Surface Problems on Walls
Step 1. Surface Preparation
Make sure the surface is thoroughly dry and clean, free from dust and powder impurities.
Step 2. Crack Reparation
Repair any cracks on the surface prior to paint application. Allow all rectified areas to dry thoroughly with a moisture level below 16%.
Recommended products
Hairline Crack Reparation:
EasySKIM PLUS 2000
NippoSEAL Flex 200 Fibre Pro
Normal Crack Reparation:
CrackREPAIR 1000
*In situations where no cracks are present, the sealer can be directly applied after surface preparation.
Step 3. Sealer / Primer
Apply a coat of sealer to protect your walls from moisture and surface imperfections.
Recommended products
Sealer / Primer:
Acrylic 5170 Wall Sealer or
Hi-bond Wall Sealer
Step 4. Topcoat
Finish it off with a topcoat specially formulated for interior walls.
Recommended products
Topcoat:
Super ECO 5000
Step 1. Surface Preparation
Make sure the surface is thoroughly dry and clean, free from dust and powder impurities.
Step 2. Crack Reparation
Repair any cracks on the surface prior to paint application. Allow all rectified areas to dry thoroughly with a moisture level below 16%.
Recommended products
Hairline Crack Reparation:
EasySKIM PLUS 2000
NippoSEAL Flex 200 Fibre Pro
Normal Crack Reparation:
CrackREPAIR 1000
*In situations where no cracks are present, the sealer can be directly applied after surface preparation.
Step 3. Sealer / Primer
Apply a coat of sealer to protect your walls from moisture and surface imperfections.
Recommended products
Sealer / Primer:
Acrylic 5170 Wall Sealer or
Hi-bond Wall Sealer
Step 4. Topcoat
Finish it off with a topcoat specially formulated for protecting exterior walls.
Recommended products
Topcoat:
Weatherbond®
Weatherbond® Hi-Gloss
Weatherbond® Solareflect Extreme
Weatherbond® Ultimate
What is Paint Peeling?
Wall paint peeling is commonly caused by expired or old paint film, incorrect painting system application which allows unwanted moisture absorption, or inadequate surface cleaning before applying paint. All of this affects the paint's adhesion, leading to paint flaking, peeling, or blistering on interior and exterior walls.

How to Solve Paint Peeling Problems on Walls
Step 1. Surface Preparation
Thoroughly clean and dry the substrate. Remove all loose paint films from the substrate.
Step 2. Crack Reparation
Repair any cracks on the surface prior to the paint application. Allow all rectified areas to dry thoroughly with a moisture level below 16%.
Recommended products
Hairline Crack Reparation:
EasySKIM PLUS 2000
NippoSEAL Flex 200 Fibre Pro
Normal Crack Reparation:
CrackREPAIR 1000
*In situations where no cracks are present, the sealer can be directly applied after surface preparation.
Step 3. Sealer / Primer
Apply a coat of sealer to protect your walls from moisture and surface imperfections.
Recommended products
Sealer / Primer:
Acrylic 5170 Wall Sealer or
Hi-bond Wall Sealer
Step 4. Topcoat
Finish it off with a topcoat specially formulated for protecting interior walls.
Recommended products
Topcoat:
Super ECO 5000
Step 1. Surface Preparation
Thoroughly clean and dry the substrate. Remove all loose paint films from the substrate.
Step 2. Crack Reparation
Repair any cracks on the surface prior to the paint application. Allow all rectified areas to dry thoroughly with a moisture level below 16%.
Recommended products
Hairline Crack Reparation:
EasySKIM PLUS 2000
NippoSEAL Flex 200 Fibre Pro
Normal Crack Reparation:
CrackREPAIR 1000
*In situations where no cracks are present, the sealer can be directly applied after surface preparation.
Step 3. Sealer / Primer
Apply a coat of sealer to protect your walls from moisture and surface imperfections.
Recommended products
Sealer / Primer:
Acrylic 5170 Wall Sealer or
Hi-bond Wall Sealer
Step 4. Topcoat
Finish it off with a topcoat specially formulated for protecting exterior walls.
Recommended products
Topcoat:
Weatherbond®
Weatherbond® Hi-Gloss
Weatherbond® Solareflect Extreme
Weatherbond® Ultimate
What is Watermark?
One of the first signs of water damage are watermarks and discolourations on your walls. It is caused by moisture migration to the wall's surface, which then creates water stains. Appearing as yellow, brown, or dark stain on walls, these watermarks pose a problem to a building's aesthetics and might also lead to health-hazardous mould growth. Getting rid of these unsightly watermarks on walls can be done with the right steps and Nippon Paint's recommended products.

How to Solve Watermark Problems on Walls
Step 1. Surface Preparation
Thoroughly clean and dry the substrate free from dust, grease and oil. Remove all contaminants, previous waterproofing and impurites till bare substrate.
Step 2. Crack Reparation
Repair any cracks on the surface prior to the paint application. Allow all rectified areas to dry thoroughly with a moisture level below 16%.
Recommended products
Hairline Crack Reparation:
EasySKIM PLUS 2000
NippoSEAL Flex 200 Fibre Pro
Normal Crack Reparation:
CrackREPAIR 1000
*In situations where no cracks are present, the sealer can be directly applied after surface preparation.
Step 3. Sealer / Primer
Apply a coat of sealer to protect your masonry wall from moisture and surface imperfections.
Recommended products
Sealer / Primer:
Acrylic 5170 Wall Sealer
Step 4. Topcoat
Finish it off with a topcoat specially formulated for protecting interior walls.
Recommended products
Topcoat:
Super ECO 5000
Step 1. Surface Preparation
Thoroughly clean and dry the substrate free from dust, grease and oil. Remove all contaminants, previous waterproofing and impurites till bare substrate.
Step 2. Crack Reparation
Repair any cracks on the surface prior to the paint application. Allow all rectified areas to dry thoroughly with a moisture level below 16%.
Recommended products
Hairline Crack Reparation:
EasySKIM PLUS 2000
NippoSEAL Flex 200 Fibre Pro
Normal Crack Reparation:
CrackREPAIR 1000
*In situations where no cracks are present, the sealer can be directly applied after surface preparation.
Step 3. Sealer / Primer
Apply a coat of sealer to protect your masonry wall from moisture and surface imperfections.
Recommended products
Sealer / Primer:
Acrylic 5170 Wall Sealer
Step 4. Topcoat
Finish it off with a topcoat specially formulated for protecting exterior walls.
Recommended products
Topcoat:
Weatherbond®
Weatherbond® Hi-Gloss
Weatherbond® Solareflect Extreme
Weatherbond® Ultimate
What is Tile Delamination?
Tile delamination is when tiles come loose from walls, and is caused by incompatible tile adhesive and the tiles or the rendered surface. Delamination of ceramic tiles can be avoided by ensuring a proper tile installation process to help prevent water from seeping in between the tiles, reducing the chances of the tiles becoming loose over time and falling off.

How to Solve Tile Delamination Problem on Walls
Step 1. Surface Preparation
Thoroughly clean and dry the subtrate free of dust, grease and oil. Remove all existing tile adhesive from the substrate.
Step 2. Tile Adhesive
Apply tile adhesive on the substrate and replace the delaminated tiles.
Recommended products
Tile Adhesive:
CMI® TileStick 338 with
CMI® MultiFix 188 or
CMI® TileFlex 186
*Please refer to our CMI Tile Adhesive Range (dependent on tile size)
Step 3. Tile Jointing
Apply water-resistant grouting between tile joints and allow to dry for 24 hours.
Recommended products
Tile Jointing:
CMI® Tile Joint Filler
What is Hollowness?
Hollowness is when a tile is tapped and produces a hollow sound, signifying that the tile is not laid properly or there is a void beneath that portion of tiles. Tile hollowness is caused by incorrect tile adhesives, improper mixing and application of adhesive, and poor workmanship during the tile installation process.

How to Solve Hollowness Problem on Walls
Step 1. Surface Preparation
Hack the tiles from affected areas and clean the area of dirt, dust, grease, contaminants. Remove all existing tile adhesive on the substrate.
Step 2. Tile Adhesive
Apply tile adhesive on the substrate and replace the affected tiles.
Recommended products
Tile Adhesive:
CMI® TileStick 338 with
CMI® MultiFix 188 or
CMI® TileFlex 186
*Please refer to our CMI Tile Adhesive Range (dependent on tile size)
Step 3. Tile Jointing
Apply joint filler to prevent dirt from getting under your tiles and allow to dry for 24 hours.
Recommended products
Tile Jointing:
CMI® Tile Joint Filler
What is Fungus and Mould?
Fungus and mould growth on walls appear as green, brown or black patches, especially in areas with high humidity or moisture. It is caused by the growth and spread of fungus and mould spores on damp walls. Exposure to mould can create health problems if left unchecked. Removing and preventing fungus and mould growth on walls is vital to maintain a building's aesthetic and value.

How to Solve Fungus and Mould Problem on Walls
Step 1. Surface Preparation
Remove all fungal and algae growth using a high pressure water-jet (min. 1500 psi).
Step 2. Fungicide Wash
Treat affected surfaces with fungicidal wash to remove remaining spores. Leave for 24 hours and allow to dry. Clean the surface once more prior to paint application. Allow all the rectified areas to dry thoroughly with a moisture level below 16%.
Recommended products
Fungicide Wash:
Fungicidal Wash
Step 3. Sealer / Primer
Apply a coat of sealer to create a barrier against moisture and prevent water from entering the wall.
Recommended products
Sealer / Primer:
5100 Wall Sealer
Step 4. Topcoat
Finish it off with a topcoat specially formulated for protecting exterior walls.
Recommended products
Topcoat:
Weatherbond®
Weatherbond® Hi-Gloss
Weatherbond® Solareflect Extreme
Weatherbond® Ultimate
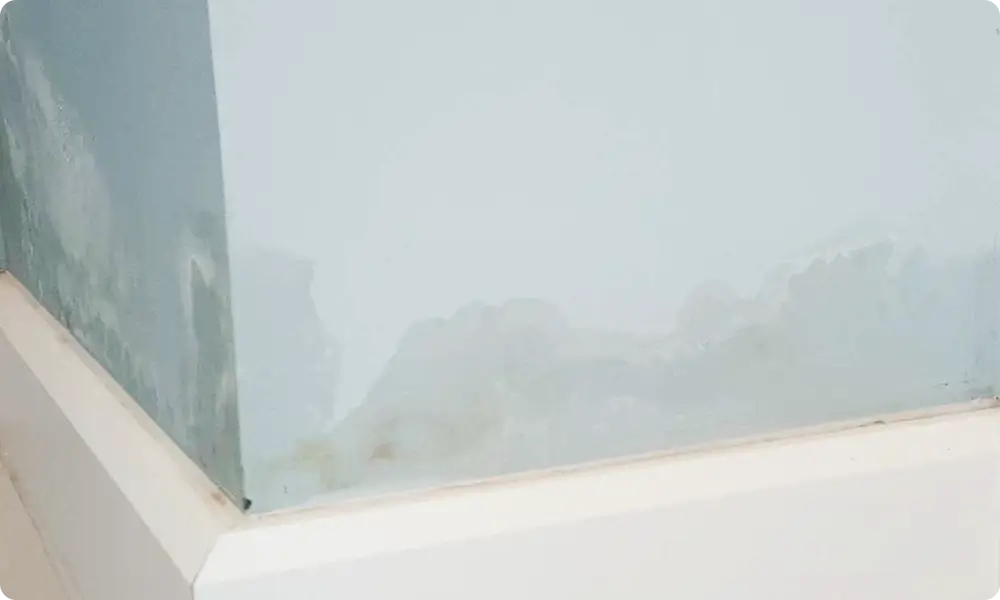
What is Rising Damp Wall?
Water rising from the bottom of walls, known as rising damp, is mainly caused via capillary action, which is when moisture from the ground travels through cracks in the substrate and up the walls. Moisture in the walls of a building can cause damage to its integrity, besides marring its physical appearance. Fixing rising damp problems can be done with proper waterproofing and surface preparation.

How to Solve Rising Damp Wall Problem on Walls
Step 1. Surface Preparation
The substrate must be thoroughly clean and dry, free from dust, algae, mildew and fungus. All previous paint film are to be removed prior to application of waterproofing membrane.
Step 2. Waterproofing Coat
Apply 2 coats of waterproofing membrane to create a barrier against moisture and prevent water from entering the wall.
Recommended products
1st Layer:
NippoSEAL FLEXSIL
2nd Layer:
NippoSEAL FLEXSIL
*NippoSEAL FLEXSIL cannot be painted over.
What is Paint Peeling?
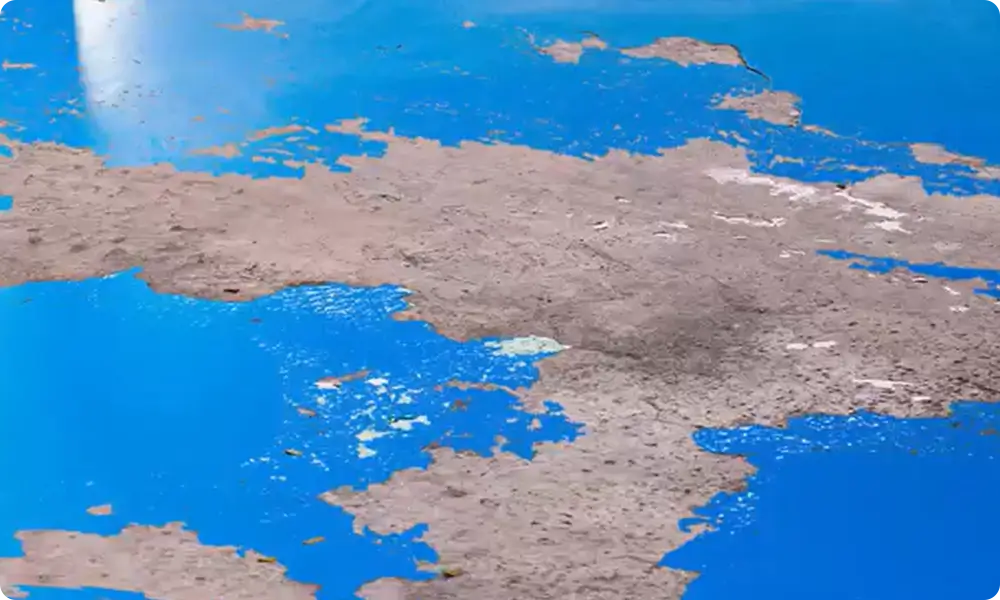
Floor paint peeling is commonly caused by expired or old paint film or an incorrect painting system, which affects the paint's adhesion. When the paint film on the floor loses its adhesion, flaking and peeling occurs. Paint peeling problems on your floors can be fixed and prevented with proper surface preparation and using Nippon Paint's recommended products.

How to Solve Paint Peeling Problems on Floors
Step 1. Surface Preparation
Thoroughly clean and dry the floor substrate free of dust, grease and oil. Remove any remaining loose paint film. Ensure proper grinding / scarifying is done to achieve the desired surface profile.
Step 2. Sealer / Primer
Apply a coat of primer to seal the porosity of the concrete surface and provide better adhesion.
Recommended products
Primer:
FloorShield SF Epoxy Primer
Step 3. Topcoat
Finish it off with a topcoat specially formulated for protecting floors.
Recommended products
Topcoat (Interior):
FloorShield SF Epoxy Finish
Topcoat (Exterior):
FloorShield SB PU Finish
Step 1. Surface Preparation
Thoroughly clean and dry the floor substrate free of dust, grease and oil. Remove any remaining loose paint film. Ensure proper grinding / scarifying is done to achieve the desired surface profile.
Step 2. Sealer / Primer
Apply a coat of primer to seal porosity of the concrete surface and provide better adhesion.
Recommended products
Sealer / Primer:
FloorShield SF Epoxy Primer
Step 3. Moisture Barrier
Apply a coat of moisture barrier for concrete surfaces with more than 4% moisture content.
Recommended products
Moisture Barrier:
FloorShield SF Epoxy Mortar
Step 4. Scratch Coat
Apply a scratch coat to even out irregularities and improve adhesion to the next coat.
Recommended products
Scratch Coat:
FloorShield SF OP Textured Finish
Step 5. Topcoat
Finish it off with a topcoat specially formulated for protecting floors.
Recommended products
Topcoat (Interior):
FloorShield SF Epoxy Finish
Topcoat (Exterior):
FloorShield SB PU Finish
What is Paint Bulging?
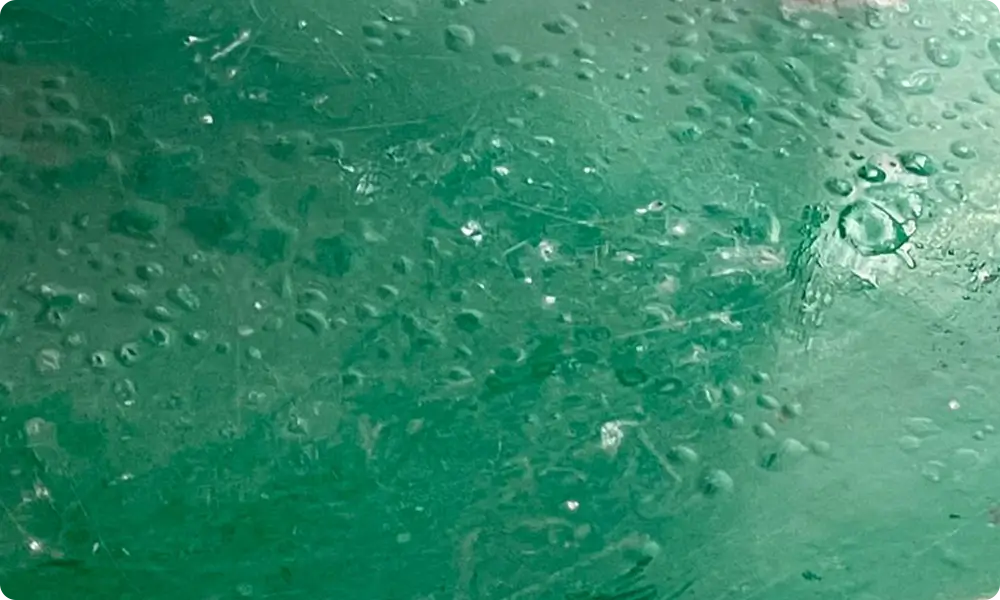
Paint bulging, also known as paint bubbling or blistering is the result of excess moisture in the concrete where moisture levels have exceeded 4%. This causes adhesion to deteriorate and the paint film pulls away from the surface, creating air pockets or bubbles. Paint bulging and air bubble problems in floor paint can be fixed with proper surface preparation and using Nippon Paint's recommended products.

How to Solve Paint Bulging Problem on Floors
Step 1. Surface Preparation
Thoroughly clean and dry the floor substrate free of dust, grease and oil. Remove any remaining loose paint film. Ensure proper grinding / scarifying is done to achieve the desired surface profile.
Step 2. Primer
Apply a coat of primer to seal porosity of the concrete surface and provide better adhesion.
Recommended products
Sealer / Primer:
FloorShield SF Epoxy Primer
Step 3. Moisture Barrier
Apply a coat of moisture barrier for concrete surfaces with more than 4% moisture content.
Recommended products
Moisture Barrier:
FloorShield SF Epoxy Mortar
Step 4. Scratch Coat
Apply a scratch coat to even out irregularities and improve adhesion to the next coat.
Recommended products
Scratch Coat:
FloorShield SF OP Textured Finish
Step 5. Topcoat
Finish it off with a topcoat specially formulated for protecting floors.
Recommended products
Topcoat (Interior):
FloorShield SF Epoxy Finish
Topcoat (Exterior):
FloorShield SB PU Finish
What is Thermal Shock Cracking?
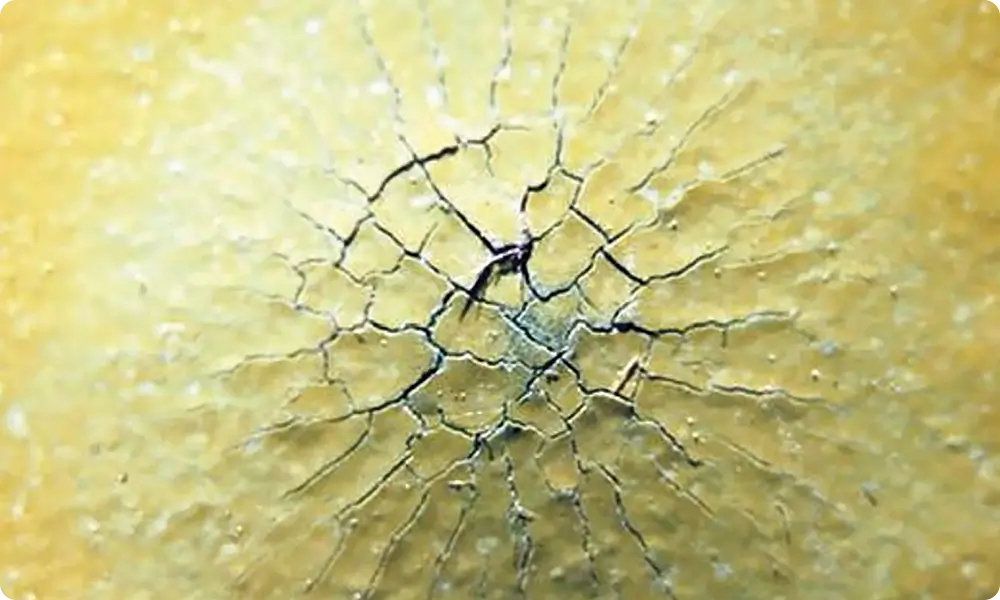
Floor cracking from thermal shock is caused by an incorrect coating system used in areas where there are rapid changes in temperature, resulting in an extreme difference in temperature within the concrete whereby the cooler areas contracts significantly, causing cracks to form.

How to Solve Thermal Shock Cracking Problems on Floors
Step 1. Surface Preparation
Thoroughly clean and dry the floor substrate free of dust, grease and oil, and any remaining loose paint film. Ensure proper grinding / scarifying is done to achieve the desired surface profile.
Step 2. Primer
Apply a coat of primer to seal porosity of the concrete surface and provide better adhesion.
Recommended products
Primer:
AquaPrime Epoxy Primer (Red)
Step 3. Scratch Coat
Apply a scratch coat to even out irregularities and improve adhesion to the next coat.
Recommended products
Scratch Coat:
FloorShield Ucreed® MD
Step 4. Finish Coat
Complete the process with a finish coat specially formulated for protecting floors.
Recommended products
Finish Coat:
FloorShield Ucreed® MD
Step 1. Surface Preparation
Thoroughly clean and dry the floor substrate free of dust, grease and oil, and any remaining loose paint film. Ensure proper grinding / scarifying is done to achieve the desired surface profile.
Step 2. Primer
Apply a coat of primer to seal porosity of the concrete surface and provide better adhesion.
Recommended products
Primer:
AquaPrime Epoxy Primer (Red)
Step 3. Scratch Coat
Apply a scratch coat to even out irregularities and improve adhesion to the next coat.
Recommended products
Scratch Coat:
FloorShield Ucreed® MD
Step 4. Finish Coat
Complete the process with a finish coat specially formulated for protecting floors.
Recommended products
Finish Coat:
FloorShield Ucreed® HD
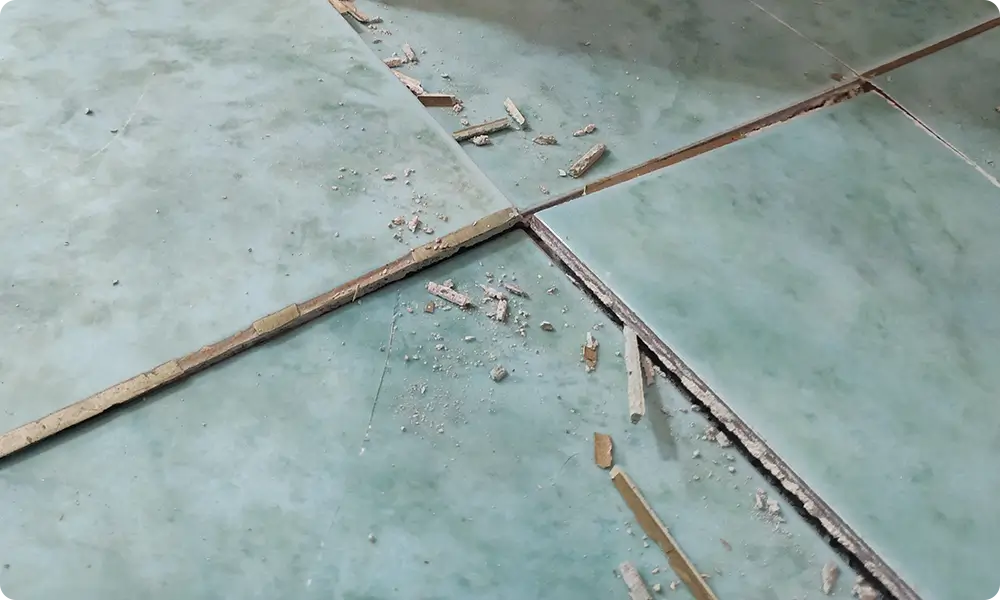
What is Tiles Buckling?
Tile buckling, also known as tile popping or tile tenting, is when the tiles lift or are pushed up from the substrate. When tiles are applied too closely to one another, expansion and contraction of the substrate can cause tiles to buckle. Tile buckling not only makes for ugly, uneven floors, it can be a potential safety hazard if tiles are prone to cracking or shattering.

How to Solve Tiles Buckling Problem on Floors
Step 1. Surface Preparation
Hack the tiles from the affected areas and clean the area of dirt, dust, grease, contaminants that may inhibit proper bonding. Remove all previous tile adhesive on the substrate.
Step 2. Tile Adhesive
Apply tile adhesive as a bonding agent on the substrate and replace the affected tiles.
Recommended products
Tile Adhesive:
CMI® TileStick 338 with
CMI® MultiFix 188 or
CMI® TileFlex 186
*Please refer to our CMI Tile Adhesive Range (dependent on tile size)
Step 3. Tile Jointing
Apply joint filler to prevent dirt from getting under your tiles and allow to dry for 24 hours.
Recommended products
Tile Jointing:
CMI® Tile Joint Filler
What is Water Leakage?
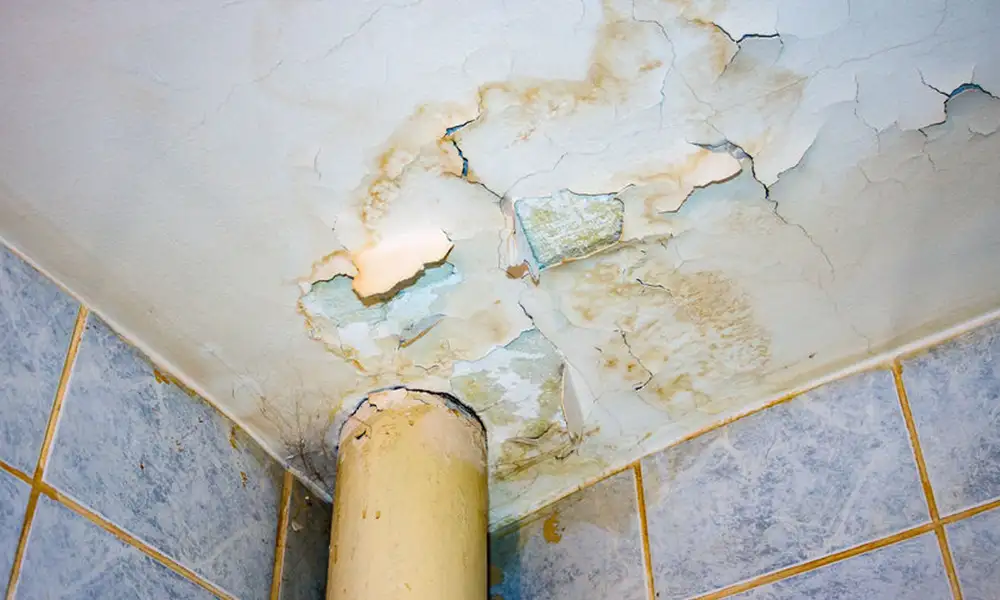
Inter-floor water leakage on ceilings mainly happen due to poor workmanship on the floor above which causes water to leak into the levels below. Appearing as yellow or brownish water stains or even sagging ceilings, these could be signs of serious damage to your building. Water leakage problems can be prevented with proper waterproofing during the tile application stage.

How to Solve Water Leakage (Wet Area) Problem on Ceiling
Step 1. Surface Preparation
Thoroughly clean and dry the substrate free of dust, grease and oil. Then, remove all contaminants, previous waterproofing, tiles and impurities till the substrate is bare.
Step 2. Primer
Apply two coats of primer to seal porosity of the concrete surface and provide better adhesion.
Recommended products
Primer:
NippoCEM STANDARD
Step 3. Tile Adhesive
Apply tile adhesive as a bonding agent on the substrate and replace the affected tiles.
Recommended products
Tile Adhesive:
CMI® TileStick 338 with
CMI® MultiFix 188 or
CMI® TileFlex 186
*Please refer to our CMI Tile Adhesive Range (dependent on tile size)
Step 4. Tile Grout
Apply joint filler to prevent dirt from getting under your tiles and allow to dry for 24 hours.
Recommended products
Tile Grout:
CMI Tile Joint Filler
What is Water Leakage?
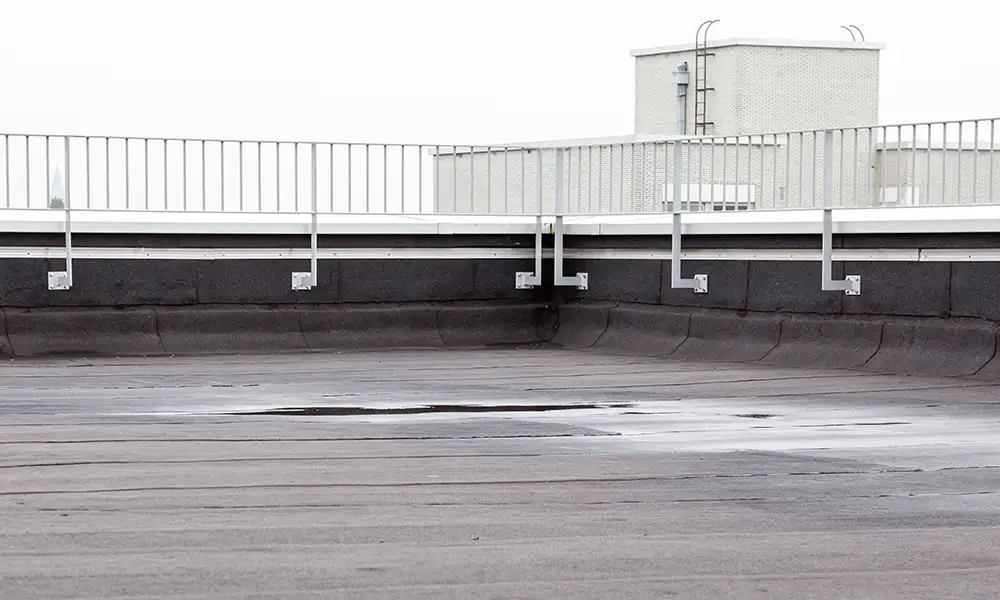
Concrete flat roofs are susceptible to water leakage problems from water pooling on its surface. Water leakage from flat roof ceilings are caused by incorrect coating application and poor workmanship on flat roof surfaces. Solving water leakage problems from flat roof ceilings can be achieved with the right products to ensure the substrate is properly primed and sealed against moisture.

How to Solve Water Leakage on Flat Roof
Step 1. Surface Preparation
Thoroughly clean and dry the substrate free of dust, grease and oil. Then, remove all contaminants, previous waterproofing, tiles and impurities till the substrate is bare.
Step 2. Crack Reparation
Any cracks, honey combs, and water leakage area should be repaired with Nippon Paint Repair System (for more details, please refer to Nippon Paint Technical Department) before proceeding with any waterproofing work. The substrate must be sound and the concrete surface should be flat and free from holes and undulations. Any holes and undulations should be resurfaced with Nippon Paint Scratch Coat System. The surface should be clean, smooth and should have a slope of at least 1-2% to allow water run-off.
Step 3. Waterproofing Coat
Apply liquid waterproofing membrane.
Recommended products
1st Coat:
NippoSEAL FLEX 200
Reinforcement Layer:
LM Mat
2nd Coat:
NippoSEAL FLEX 200
3rd Coat:
NippoSEAL FLEX 200
*Depending on the site condition
Step 1. Surface Preparation
Thoroughly clean and dry the substrate free of dust, grease and oil. Then, remove all contaminants, previous waterproofing, tiles and impurities till the substrate is bare.
Step 2. Crack Reparation
Any cracks, honey combs, and water leakage area should be repaired with Nippon Paint Repair System (for more details, please refer to Nippon Paint Technical Department) before proceeding with any waterproofing work. The substrate must be sound and the concrete surface should be flat and free from holes and undulations. Any holes and undulations should be resurfaced with Nippon Paint Scratch Coat System. The surface should be clean, smooth and should have a slope of at least 1-2% to allow water run-off.
Step 3. Waterproofing System
Apply a bitumen-based waterproofing sheet membrane.
Recommended products
Primer:
PRIMEBIT
Waterproofing:
NippoGARD M4000-TA
*Depending on the site condition
What is Water Leakage?
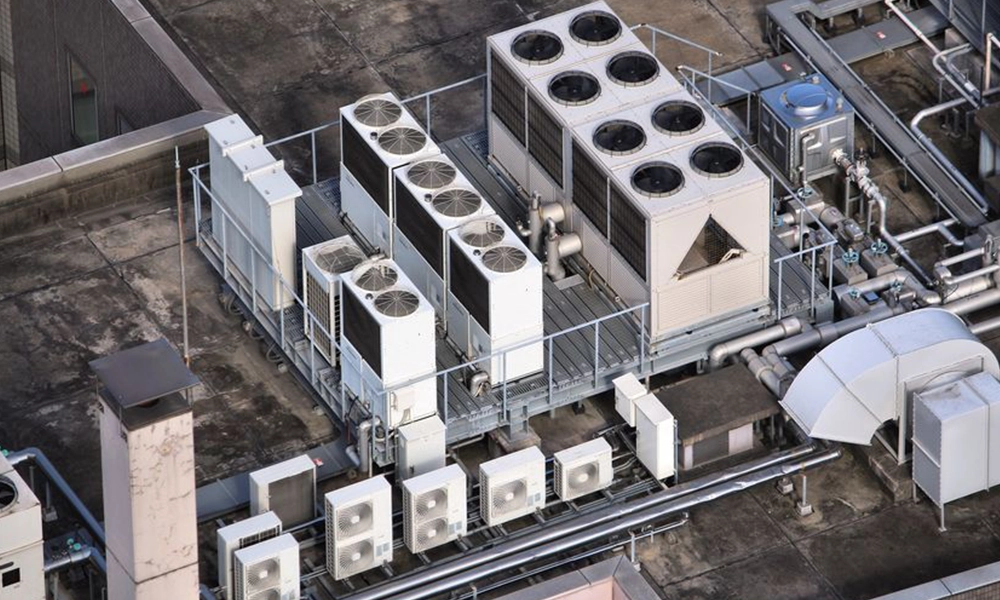
Concrete flat roofs are prone to water leakage issues due to water pooling on their surface. Leakage from flat roof ceilings often occurs when obstacles on the roof, such as debris or improper installations, prevent proper water drainage. Addressing water leakage problems can be effectively achieved by using the appropriate products to ensure the substrate is thoroughly primed and sealed, providing reliable protection against moisture.

How to Solve Water Leakage Problem on Obstacle Roof
Step 1. Surface Preparation
Thoroughly clean and dry the substrate free of dust, grease and oil. Then, remove all contaminants, previous waterproofing, tiles and impurities till the substrate is bare.
Step 2. Crack Reparation
Any cracks, honey combs, and water leakage area should be repaired with Nippon Paint Repair System (for more details, please refer to Nippon Paint Technical Department) before proceeding with any waterproofing work. The substrate must be sound and the concrete surface should be flat and free from holes and undulations. Any holes and undulations should be resurfaced with Nippon Paint Scratch Coat System. The surface should be clean, smooth and should have a slope of at least 1-2% to allow water run-off.
Step 3. Waterproofing System
Apply liquid waterproofing membrane.
Recommended products
1st Coat:
NippoSEAL FLEX 200
Reinforcement Layer:
LM Mat
2nd Coat:
NippoSEAL FLEX 200
3nd Coat:
NippoSEAL FLEX 200
*Depending on the site condition
What is Water Leakage?
Bathrooms are susceptible to water leakage due to water pooling on the floor or walls. Water leakage in bathroom surfaces often arises when obstacles, such as clogged drains or faulty installations, obstruct proper water flow. Addressing leakage issues can be achieved by using the right products to ensure the surfaces are properly sealed and waterproofed, providing reliable protection against moisture intrusion.

How to Solve Water Leakage Problem on Bathroom or in Bathroom
Step 1. Surface Preparation
Hack the tiles from the affected areas and clean the area of dirt, dust, grease, contaminants that may inhibit proper bonding. Remove all previous tile adhesive on the substrate.
Step 2. Waterproofing System
Apply acrylic polymer modified cementitious waterproofing coatings.
Recommended products
1st Layer:
NippoCEM STANDARD 701
2nd Layer:
NippoCEM STANDARD 701
*Depending on the site condition
Step 3. Floor Screeding
To level rough and uneven concrete substrates.
Recommended products
FloorScreed:
CMI® FloorScreed 085
Step 4. Tile Adhesive
Apply tile adhesive on the substrate and replace the affected tiles.
Recommended products
Tile Adhesive:
CMI® TileFix 181 + CMI® Mortar Admix 380 or
CMI® TileGrip 185
*Please refer to our CMI Tile Adhesive Range (dependent on tile size)
Step 5. Tile Jointing
Apply water-resistant grouting between tile joints and allow to dry for 24 hours.
Recommended products
Tile Jointing:
CMI® Tile Joint Filler
What is Water Leakage?
Balconies are susceptible to water leakage due to water pooling on the surface. Water leakage in balcony floors often occurs when improper applications and workmanship during installations. Resolving these leakage issues can be achieved by using the appropriate products to ensure the surface is well-sealed and waterproofed, offering reliable protection against moisture intrusion.

How to Solve Water Leakage Problem on Balcony
Step 1. Surface Preparation
Hack the tiles from the affected areas and clean the area of dirt, dust, grease, contaminants that may inhibit proper bonding. Remove all previous tile adhesive on the substrate.
Step 2. Waterproofing System
Apply acrylic polymer modified cementitious waterproofing coatings.
Recommended products
1st Layer:
NippoCEM FLEX 901
2nd Layer:
NippoCEM FLEX 901
*Depending on the site condition
Step 3. Floor Screeding
To level rough and uneven concrete substrates.
Recommended products
FloorScreed:
CMI® FloorScreed 085
Step 4. Tile Adhesive
Apply tile adhesive on the substrate and replace the affected tiles.
Recommended products
Tile Adhesive:
CMI® TileFix 181 + CMI® Mortar Admix 380 or
CMI® TileGrip 185
*Please refer to our CMI Tile Adhesive Range (dependent on tile size)
Step 5. Tile Jointing
Apply water-resistant grouting between tile joints and allow to dry for 24 hours.
Recommended products
Tile Jointing:
CMI® Tile Joint Filler
What is Water Leakage?
Swimming pools are susceptible to water leakage due to water pooling on the surface. Water leakage in swimming-pool floors often occurs when improper applications and workmanship during installations. Resolving these leakage issues can be achieved by using the appropriate products to ensure the surface is well-sealed and waterproofed, offering reliable protection against moisture intrusion.

How to Solve Water Leakage Problem on Swimming Pool
Step 1. Surface Preparation
Hack the tiles from the affected areas and clean the area of dirt, dust, grease, contaminants that may inhibit proper bonding. Remove all previous tile adhesive on the substrate.
Step 2. Waterproofing System
Apply acrylic polymer modified cementitious waterproofing coatings.
Recommended products
1st Layer:
NippoCEM FLEX 901
2nd Layer:
NippoCEM FLEX 901
*Depending on the site condition
Step 3. Floor Screeding
To level rough and uneven concrete substrates.
Recommended products
FloorScreed:
CMI® FloorScreed 085
Step 4. Tile Adhesive
Apply tile adhesive on the substrate and replace the affected tiles.
Recommended products
Tile Adhesive:
CMI® TileFix 181 + CMI® Mortar Admix 380
Step 5. Tile Jointing
Apply water-resistant grouting between tile joints and allow to dry for 24 hours.
Recommended products
Tile Jointing:
CMI® Tile Joint Filler
What is Window Perimeter?
Mould growth around the interior window perimeter is a sign of migration of moisture from exterior to interior surfaces. To solve window perimeter moisture issues, the sealant should be replaced completely to prevent further water damage.
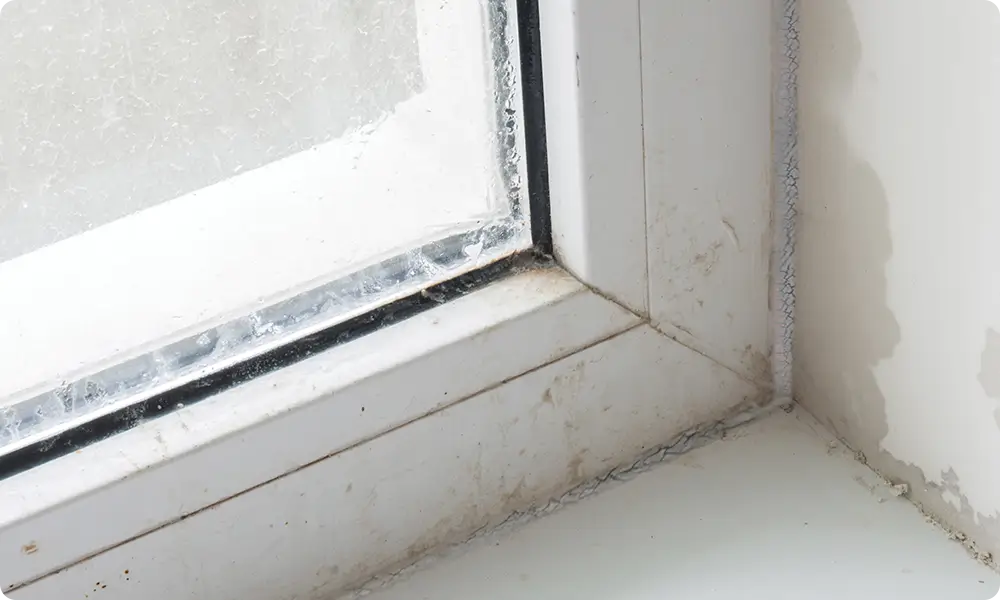
How to Solve Window Perimeter Problem on Metals
Step 1. Surface Preparation
Thoroughly remove all foreign materials from joint substrate. Clean porous joint surfaces thoroughly for optimal sealant adhesion and more effective sealant bonding. This should be done using chemicals or methods that won't harm the joint substrate or interfere with sealant adhesion.
Step 2. Silicone Sealant
Apply a coat of silicone sealant to create a barrier against moisture and prevent water from leaking through.
Recommended products
Silicone Sealant:
VT-210 High Performance Sealant or
VT-620 LM MS Sealant
*VT-210 cannot be painted over, VT-620 can be painted over.
What is Corrosion?
Steel corrosion is when the metal oxidizes and appears as orange-brownish patches, more commonly known as rust. Corrosion can occur more easily due to incorrect painting application and a lack of maintenance throughout its lifespan. Proper paint system application is a great way to prevent and resist corrosion on steel structures.
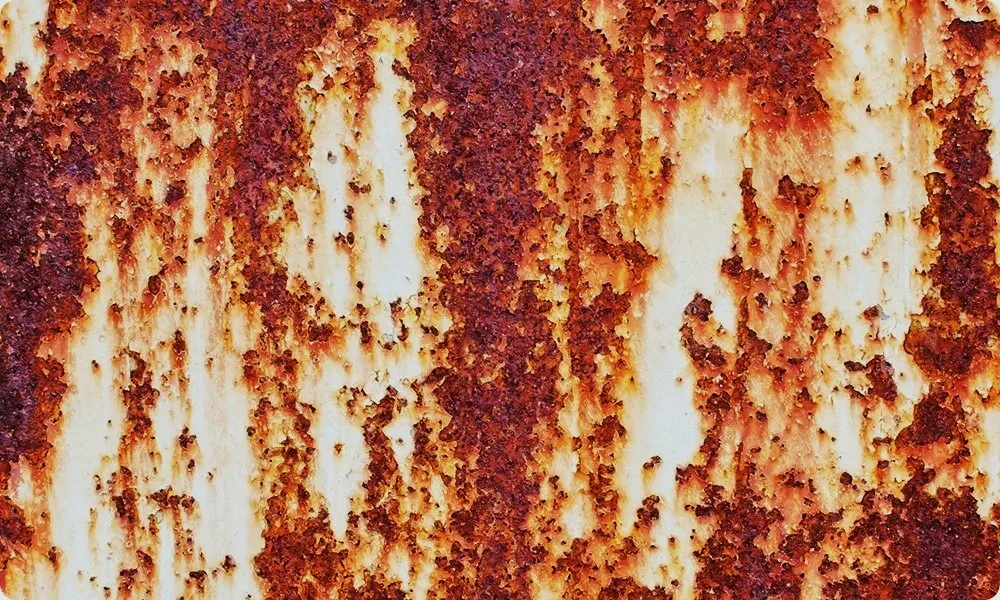
How to Solve Corrosion Problems on Metals?
Step 1. Surface Preparation
For optimum performance, abrasive blasting in accordance to SSPC-SP10 or Sa 2½ ISO 8501-1:2007 is desirable. Where abrasive blasting is not possible, mechanical cleaning to St 3 ISO 8501-1:2007 standard is acceptable. Dry brushing should be sufficient to remove dirt.
Step 2. Sealer / Primer
Apply a coat of primer for better adhesion and to create a barrier against moisture and corrosion.
Recommended products
Sealer / Primer:
8048 Zinc Phosphate Primer QD
Step 3. Intermediate Coat
Apply a barrier coat for improved corrosion protection.
Recommended products
Intermediate Coat:
8048
Step 4. Finish
Apply a protective finish coat for increased resistance against abrasion.
Recommended products
Finish:
EA4 Finish (EP)
Step 1. Surface Preparation
For optimum performance, abrasive blasting in accordance to SSPC-SP10 or Sa 2½ ISO 8501-1:2007 is desirable. Where abrasive blasting is not possible, mechanical cleaning to St 3 ISO 8501-1:2007 standard is acceptable. Dry brushing should be sufficient to remove dirt.
Step 2. Sealer / Primer
Apply a coat of primer for better adhesion and to create a barrier against moisture and corrosion.
Recommended products
Sealer / Primer:
8048 Zinc Phosphate Primer QD
Step 3. Intermediate Coat
Apply a barrier coat for improved corrosion protection.
Recommended products
Intermediate Coat:
8048
Step 4. Finish
Apply a protective finish coat for increased resistance against abrasion.
Recommended products
Finish:
PUR Lite Finish or
Polyurethane Recoatable Finish
What is Colour Fading?
Paint colour fading appears as chalking, caused by improper paint applications. Ultraviolet rays from the sun breaks down the chemical bonds in the paint hence fading the color retention and gloss.
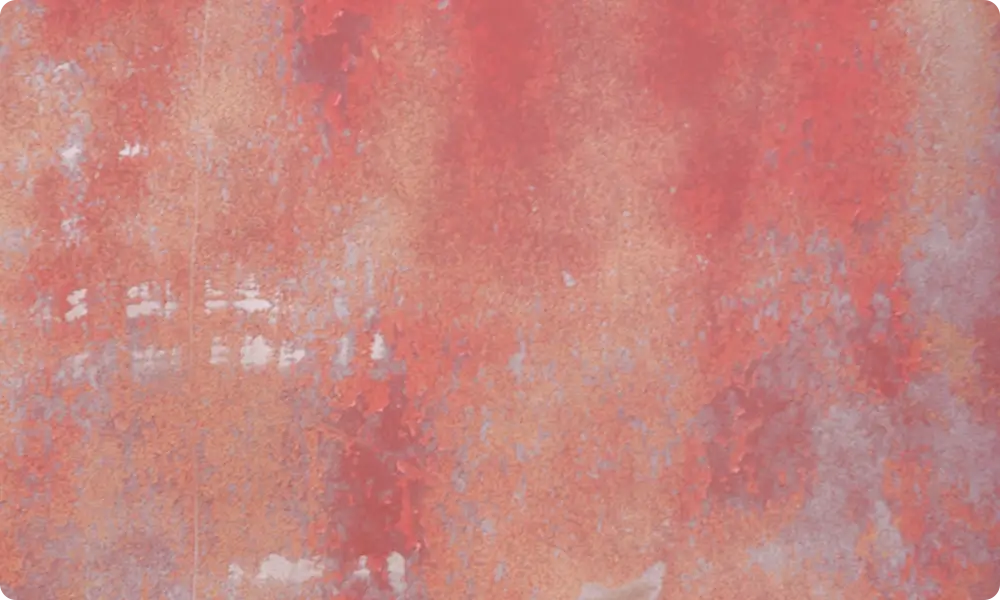
How to Solve Colour Fading Problem on Metals
Step 1. Surface Preparation
For optimum performance, abrasive blasting in accordance to the SSPC-SP10 or Sa 2½ ISO 8501-1:2007 is desirable. Where abrasive blasting is not possible, mechanical cleaning to the St 3 ISO 8501-1:2007 standard is acceptable. Dry brushing should be sufficient to remove dirt.
Step 2. Sealer / Primer
Apply a coat of primer for better adhesion and to create a barrier against moisture and corrosion.
Recommended products
Sealr / Primer:
Epoxy Xpress Zinc Phosphate Primer or
8048 Zinc Phosphate Primer QD
Step 3. Intermediate Coat
Apply a barrier coat for improved corrosion protection.
Recommended products
Intermediate Coat:
Epoxy Xpress or
8048
Step 4. Finish
Apply a protective finish coat for increased resistance against abrasion.
Recommended products
Finish:
PUR Lite Finish or
Polyurethane Recoatable Finish
What is Steel Surface Peeling?
Peeling on steel refers to the uneven, rough, and flaking irregularities on the surface of the coating applied to the metal. Steel surface peeling is caused by poor adhesion of the paint or by applying the coat after the recommended overcoating time. To ensure optimal adhesion of the coating to the substrate and to delay paint peeling, proper surface preparation and a suitable coating system are necessary.
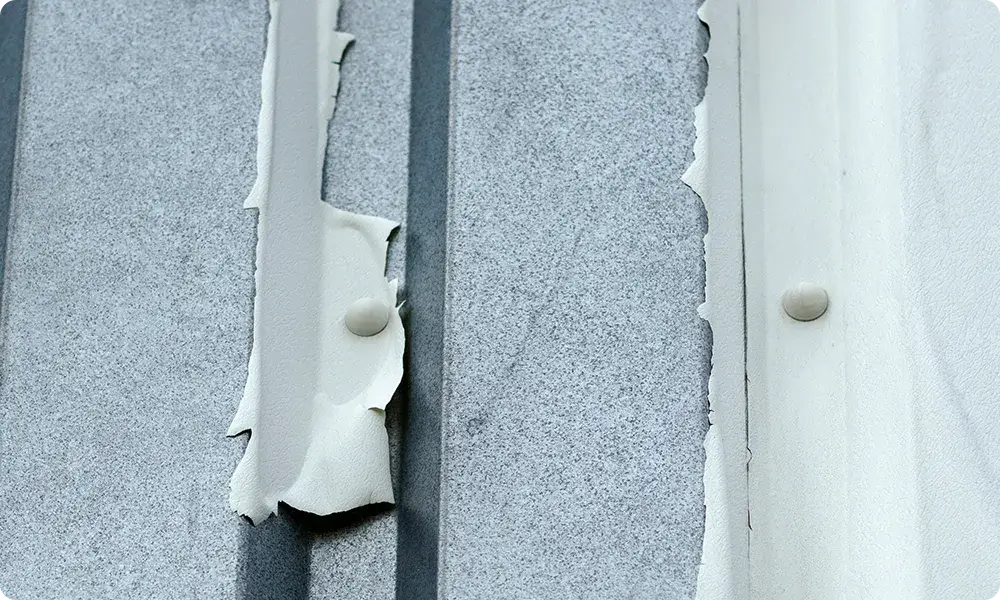
How to Solve Steel Surface Peeling Problems on Metals
Step 1. Surface Preparation
For optimum performance, abrasive blasting in accordance to the SSPC-SP10 or Sa 2½ ISO 8501-1:2007 is desirable. Where abrasive blasting is not possible, mechanical cleaning to the St 3 ISO 8501-1:2007 standard is acceptable. Dry brushing should be sufficient to remove dirt.
Step 2. Sealer / Primer
Apply a coat of primer for better adhesion and to create a barrier against moisture and corrosion.
Recommended products
Sealer / Primer:
8048 Zinc Phosphate Primer QD
Step 3. Intermediate Coat
Apply a barrier coat for improved corrosion protection.
Recommended products
Intermediate Coat:
8048
Step 4. Finish
Apply a protective finish coat for increased resistance against abrasion.
Recommended products
Finish:
EA4 Finish (EP)
Step 1. Surface Preparation
For optimum performance, abrasive blasting in accordance to the SSPC-SP10 or Sa 2½ ISO 8501-1:2007 is desirable. Where abrasive blasting is not possible, mechanical cleaning to the St 3 ISO 8501-1:2007 standard is acceptable. Dry brushing should be sufficient to remove dirt.
Step 2. Sealer / Primer
Apply a coat of primer for better adhesion and to create a barrier against moisture and corrosion.
Recommended products
Sealer / Primer:
8048 Zinc Phosphate Primer QD
Step 3. Intermediate Coat
Apply a barrier coat for improved corrosion protection.
Recommended products
Intermediate Coat:
8048
Step 4. Finish
Apply a protective finish coat for increased resistance against abrasion.
Recommended products
Finish:
PUR Lite Finish or
Polyurethane Recoatable Finish
What is Rust Metal Deck?
Rust on metal decks is caused by corrosion on the surface due to prolonged exposure to oxygen, moisture, and high temperatures. Rust is made worse by the lack of maintenance throughout the metal's lifespan.
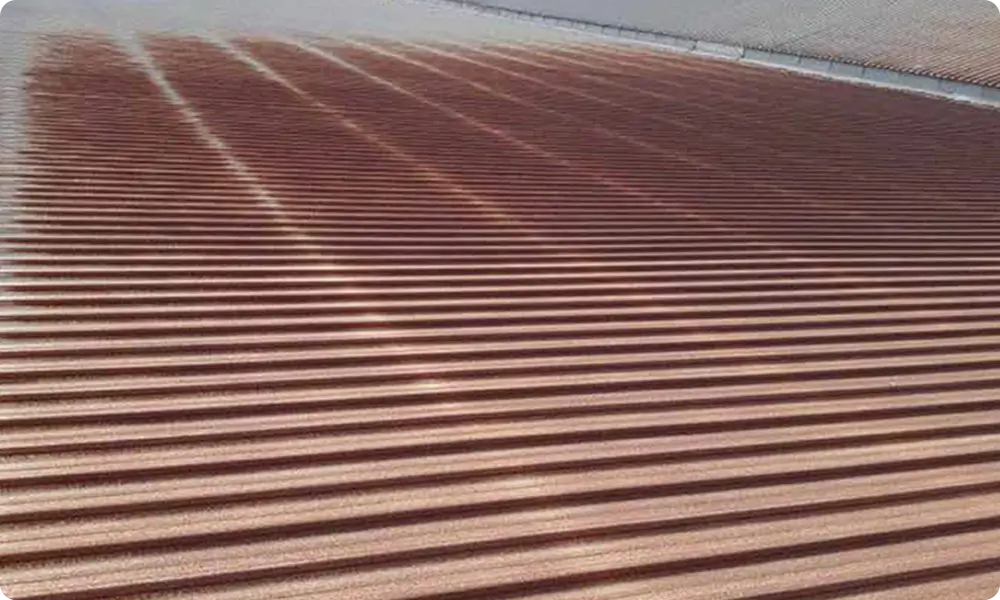
How to Solve Rust Metal Deck Problem
Step 1. Surface Preparation
For optimum performance, abrasive blasting in accordance to the SSPC-SP10 or Sa 2½ ISO 8501-1:2007 is desirable, where abrasive blasting is not possible, mechanical cleaning to the St 3 ISO 8501-1:2007 standard is adequate. Dry brushing should be sufficient to remove dirt.
Step 2. Sealer / Primer
Apply a coat of primer for better adhesion and to create a barrier against moisture and corrosion.
Recommended products
Sealer / Primer:
8048 Zinc Phosphate Primer QD
Step 3. Intermediate Coat
Apply a barrier coat for improved corrosion protection.
Recommended products
Intermediate Coat:
8048
Step 4. Finish
Apply a protective finish coat for increased resistance against abrasion.
Recommended products
Finish:
PUR Lite Finish or
Polyurethane Recoatable Finish
For Further Information
Download The Official Brochure
Browse through more in-depth product information and solutions.
Download Now

